Scientists often have to use indirect evidence to infer information about extinct species. Children (and adults!) often find it hard to understand how a footprint can tell a scientist anything about the animal that made it. Use this “mystery solving” activity to help explain how information can be collected from indirect evidence.
You will need to do a little advance preparation for this activity. You’ll need some play dough or other soft modeling clay and some plastic dinosaurs. Dinosaur models of different sizes and different types of dinosaurs will work best.
- Roll out the modeling clay in a flat sheet. This represents an area of soft mud like you would find along a river bank.
- Use the plastic dinosaurs to make footprints in the clay as if the dinosaur were walking through the mud. Be sure to space the footprints out to represent the natural stride length of the plastic figure. Also, adjust the depth of the footprint to represent the relative size of the dinosaur. A larger dinosaur would weigh more and so would sink farther into the mud, etc.
- Adjust the complexity of the footprint pattern based on the age of your child. Keep the pattern simple for younger children with only a few different dinosaurs with tracks spread apart. For older children, add more dinosaurs and have one track cross over another, etc.
- Allow the clay to dry completely. Don’t let your child see the clay or the dinosaur figures until you’re ready to have them do the activity.
The activity:
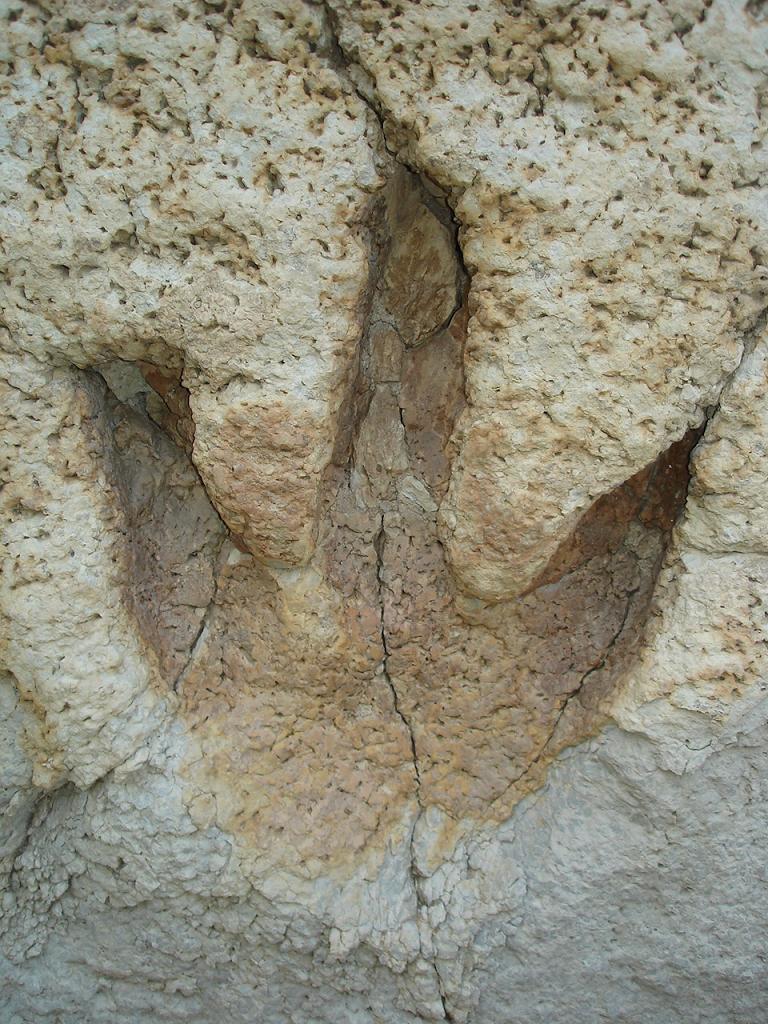
- First, give your child only the clay model. Explain to your child that this was once soft “mud” that dinosaurs walked through. Over time, the mud dried up and turned to “rock.” The footprints are indirect evidence that a dinosaur walked through a long time ago. If your child is old enough you can introduce the term, trace fossil. A trace fossil is anything that shows a prehistoric organism was there, but it doesn’t show what the organism actually looked like.
- Ask your child to look at the field and identify how many different dinosaurs walked through the field. For older children, have them trace the path of each different dinosaur, explaining what happened when paths crossed, etc.
- Now, have your child look at each different track present. Ask them to tell as much as they can about each dinosaur based on their footprints. Allow your child time to develop ideas on their own. Here are some things to suggest if they get stuck:
- Ask children to compare foot size between members of their own family. Lead them to recognize that larger people have bigger feet and apply that to the dinosaur tracks. Have your child put the dinosaurs in order based on relative size.
- Did each dinosaur walk on two legs or four legs?
- Discuss “stride length” as it relates to height. Your child has probably noticed that they have to take more steps to keep up with dad! Explain that taller people usually have longer strides. Have your child relate this idea to the dinosaur tracks. Can they tell which dinosaur was taller and shorter based on stride length?
- Have them measure the depth of the track. Relate this to the weight (size) of the dinosaur, since heavier objects would sink farther into the wet mud.
- Finally, if any of your dinosaur figures had distinctive features on the feet, see if students can identify these from the footprints. (This all depends on the models you use. For example, some models may be detailed enough to show individual toes, claws, etc.)
- After your child has inferred all they can from the footprints, bring out the models that were used to make the prints. Have your child match up the dinosaur to their footprint. Compare all the figures used and evaluate how accurate your child’s predictions were to the real thing.
To extend the lesson, do an internet search to see of there are any dinosaur tracks close enough for a local field trip or a stop along your next vacation route!